What to Use My Sliskes Endgame Lamps on Rs3
Grandmaster
Very Long
Good combat equipment (food, armor, and potions) and the Communication device, Skull of Rememberance, or one of the Black Knight Fortress disguises beneath:
- Dulcin armour cosmetic override
- Guard uniform
- Bronze helm
- Fe chainbody
- Black armour
- Black full helm
- Black platebody
- Blackness platelegs
- Dagon'hai robes
- Dagon'hai hat
- Dagon'hai robe top
- Dagon'hai robe lesser
- Elite black armour
- Elite black full captain
- Aristocracy black platebody
- Elite blackness platelegs
- Black Knight captain's armour
- Black Knight captain'due south helm
- Black Knight helm's cuirass
- Black Knight captain's gown
- Black Knight helm'due south gauntlets
- Black Knight captain'south boots
3
Proceed in heed as you lot are completing the quest, several decisions you make will change the result. These decisions include:
- Your support for 1 of the factions (Armadyl, Saradomin, Seren, Zamorak, or yourself)
- Declaration of your opposition to one of the factions (Armadyl, Saradomin, or Zamorak)
- Telling Armadyl most what Zaros did
- Advising Seren to trust or distrust Zaros
- At some point after completing the required quests you will receive a bulletin from Relomia. Once you have acquired this, travel to Draynor Village and talk to her.
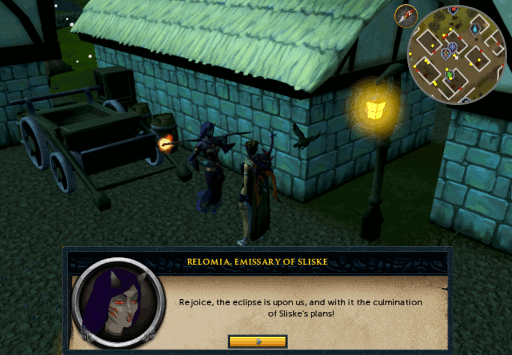
- She volition inform you that the time of the eclipse and the culmination of Sliske's game is upon u.s.a.! Merely earlier things go underway, Sliske wants you to deliver the invitations to the other gods and to brand a conclusion as to whom you support.
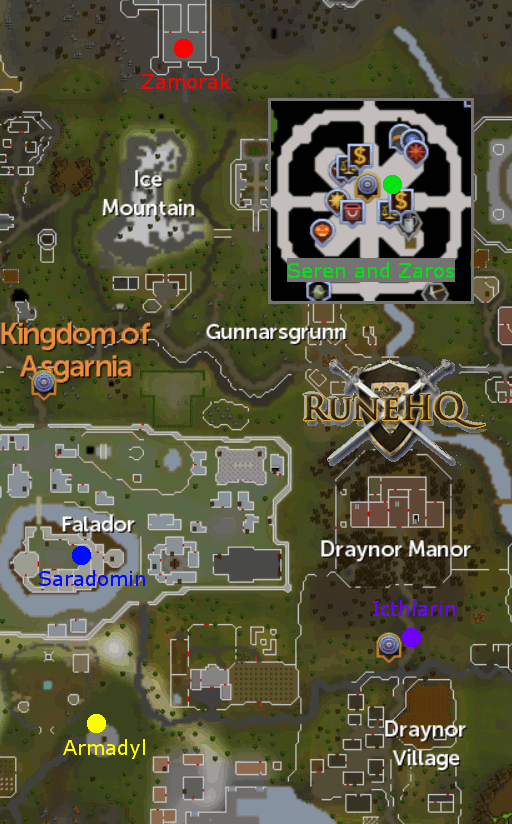
- Icthlarin can be found inside Decease's office, just North of the Draynor Hamlet lodestone
- Armadyl is perched atop his tower from World Consequence two; located slightly S East of the Clan camp, South of Falador
- Saradomin can exist plant on the third floor in Falador'south White Knight Castle well-nigh the altar.
- Zamorak can exist plant in 2 different locations. The first is on the second floor of the Black Knights Fortress to the Southern finish of the building, almost the altar (you will need a disguise or use of the Skull of Remembrance in lodge to enter the fortress). He tin also be found in his hideout past using the Advice device. You will need to left click Actuate, and so choose "Teleport to Zamorak's hideout". Once there, walk slightly Due north and speak with him.
- Seren, along with her brother Zaros, can be found on the 2nd floor of the Tower of Voices in Prifddinas.
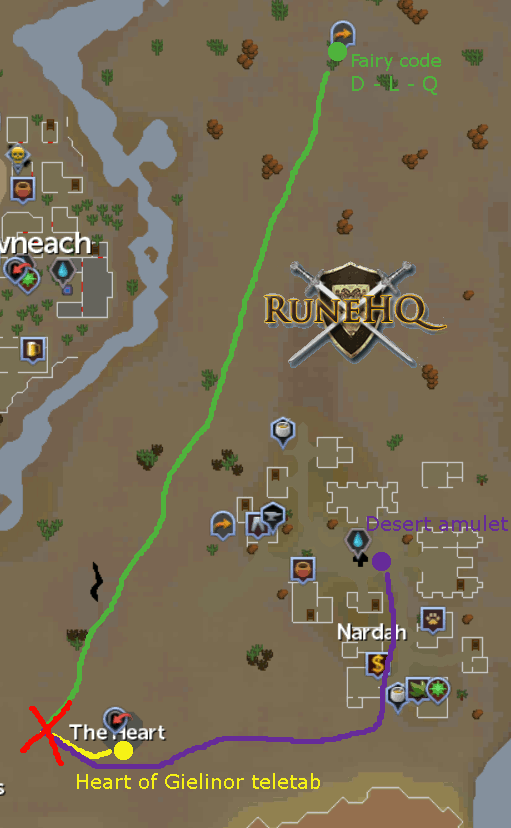
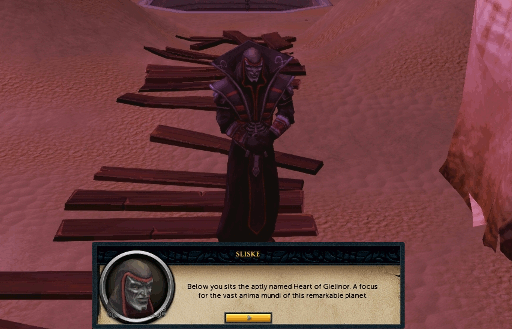
- Once y'all have seen all of the other gods, return to Draynor and talk to Relomia. She volition instruct you to meet her outside the Heart of Gielinor (God Wars 2 dungeon). The 3 fastest ways there include: using The Heart teleport, using a Desert amulet (ii, 3, or iv), and using fairy code D-Fifty-Q and then walking Due south East. You can choose to gear up at this moment (not suggested to bring beast of brunt due to the time labyrinth will take) or you lot tin cull to wait until the gainsay begins and exit before you lot start attacking to set up.
- When yous accept arrived to the Heart of Gielinor walk to the West side of the dungeon archway (do NOT go inside) and speak with Relomia. Talking with her you will be asked if you would like to continue the quest.
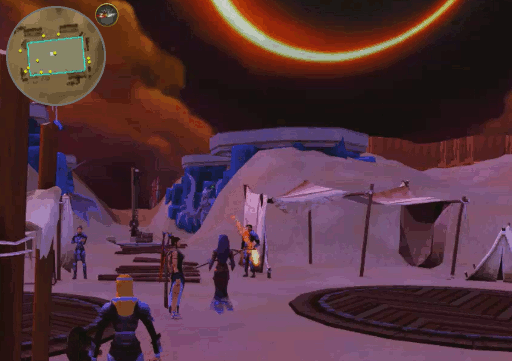
- Selecting "Yeah" will open a cutting scene where everyone volition go far for the game. Outset Armadyl, followed by Saradomin, Varago, Icthlarin, Zamorak, Seren, Zaros, Sliske, Death, Brassica Prime, Marimbo, and finally the Dragonkin. At this point you will be given the option to vouch for Kerapac or not to. Regardless of your option, both Brassica Prime and Marimbo will choose to exit and Sliske will explicate how the game will continue.
- He volition then insist you must cull whom you marshal yourself with for the game. Should you choose "no one" he will tell y'all that your choice is boring and insist you must selection someone: Armadyl, Death, Icthlarin, Saradomin, Seren, Sliske, the Dragonkin, The Godless, yourself, Zamorak, or Zaros. One time yous have made your decision, Sliske will summon Nomad and force you to fight him. The fight is rather straightforward. Nomad sticks with Melee or Magic style and does not use whatever special attacks. Later defeating him, Sliske will explain a few more than particularities with the game before plunging you all into his labyrinth.
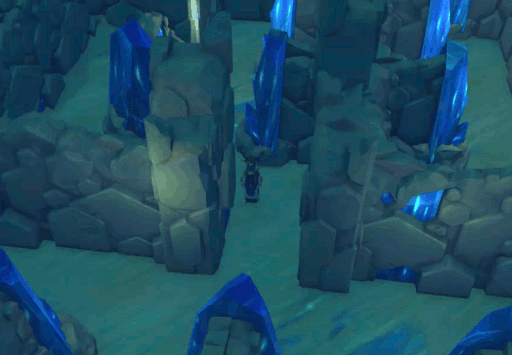
- Upon entering the Labyrinth, you will run across a curt guide on how the maze works. To sum it upward: there are 2 Labyrinth maps you volition need to complete, only the quarter of the map you are in will be visible at any given time, the get out of the Labyrinth is always in the farthest N Eastern corner, some rooms may need to be rotated (this tin can be achieved by completing a puzzle room), and retrieve this is a race!
At that place will be several choices made while in the Labyrinth, these do not affect the maze itself, however they may affect later outcomes and hereafter quests. These choices include:
- Your decision to take Icthlarin with you lot or not.
- Recommending Zaros negotiate with Sliske or try to kill him.
- If you tell Death that Icthlarin is fine or not.
- Your selection in learning the fate of one of the gods (Armadyl, Icthlarin, Saradomin, Seren, Zamorak, or Zaros) from Expiry.
- Your pick to help Saradomin or Zamorak in a fight between their knights.
- Choose a side in the argument between Zamorak and Seren.
- Your response to Seren when asked what y'all recollect is responsible for taking away the powers of the gods within the Labyrinth (Anima Mundi, Guthix, the Stone of Jas, the Sword of Edicts, or the Earth Guardian).
- Request Armadyl or Seren to mind to the other 1.
- Encouraging Seren and Saradomin to speak in individual or not.
- Talking to Vorago.
- Talking to the moulting Armadyl and potentially accepting 1 of his feathers.
- Attempting to talk to Zamorak despite Sliske'southward torment
- Armadyl'due south potential endeavor at an alliance with Vorago.
- Your decision to comfort or taunt Armadyl afterward his run across with a dragonkin.
- Choosing to have Armadyl and Saradomin cage or gratis a dragonkin.
- Talking to Saradomin near existence mortal.
- How you lot react to Zaros and Zamorak forces arguing.
- How you react to Armadyl and Zamorak arguing.
- What you recommend Azzandra and Char should do about Sliske.
- Post-obit the maps beneath, you will travel from the green dot to the xanthous and then from the xanthous dot to the red one following the chief heaven blue line. The pink lines pb to puzzles and cutscenes that are required to stop the quest and the purple lines pb to additional cutscenes that are optional.
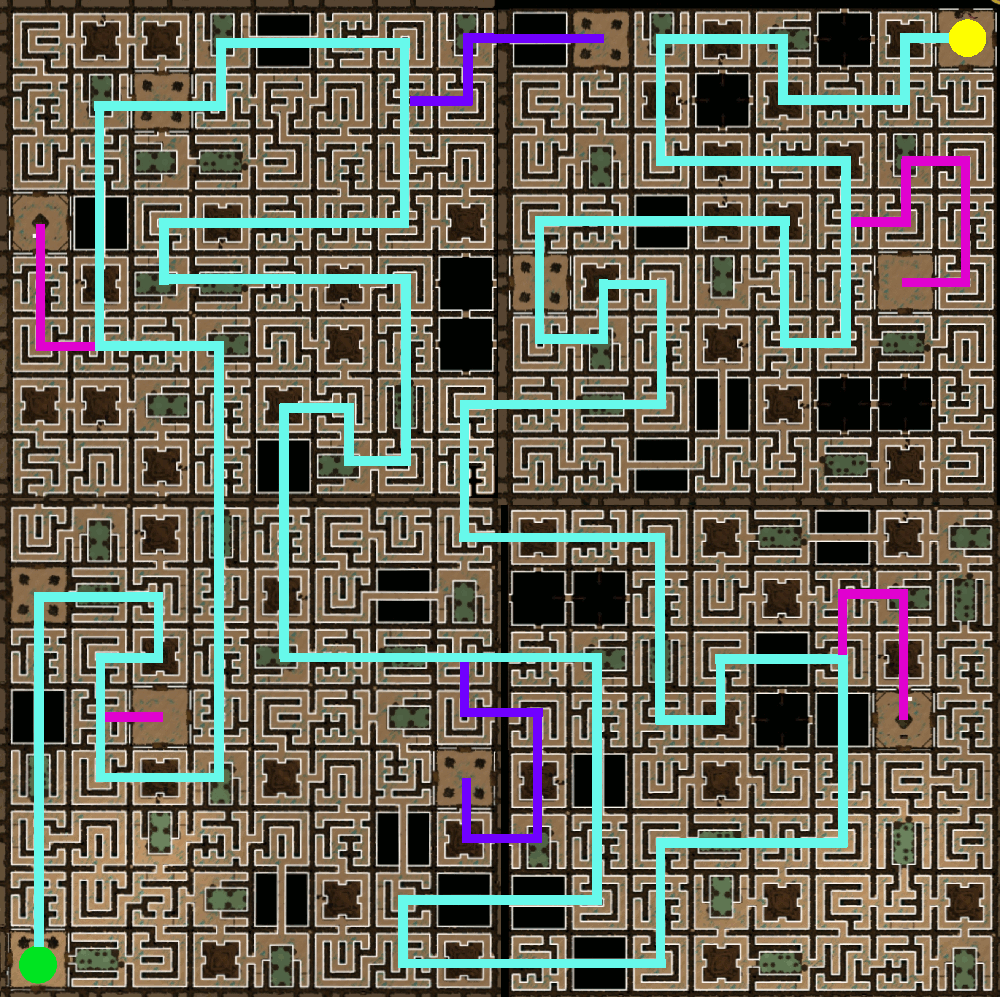
Click the in a higher place image to enlarge the start map!
Click the above image to enlarge the second map!Within the labyrinth, in that location are several types of puzzles that you can come beyond.
- Spotlight - For this puzzle you lot will be in an empty room with a spotlight moving beyond the floor. The goal of this puzzle is to stay within the light until the bar above your caput fills.
- Sliske icon - In this room you will discover 4 pillars casting a shadow in the center of the room. If one of the pillars are missing a Mask you volition demand to impale the nearby Wight in social club to retrieve it. Once the pillar has been repaired, if necessary, y'all tin can utilise the viewing panel to stand at it and rotate the pillars to create the correct shadow. Right clicking the console too provides the pick to view the solution y'all are aiming for. Adjusting one colonnade may likewise alter another so make sure yous are paying attending to what moves. Continue rotating the pillars until you match the desired Sliske icon.
- Light wisp - Within this room you will find a light wisp. You lot must harvest the energy from the wisp and then utilise information technology to empower the lamp.
- Cryptics - Here you will observe a pillar in each corner that creates a shadow on a drape. You will need to place the correct mask on each pillar based upon the riddle that the Solution console provides. In some rooms you will be missing a mask or two, these tin can exist obtained by killing the Wight(s) inside the room.
Riddle N Westward North Due east South East South West I am not a morning person; nor am I a mourning person. Bare Sad Distressing Bare I'grand bored of helping you, you can figure this one out on your own. Neutral Happy Sad Broken Misery loves company. Sad Sad Sad Sad Never let anyone see how yous truly feel, they will use it against yous. Neutral Neutral Neutral Neutral When the sun rises, nosotros are happy. When the sun sets, nosotros are sad. Sorry Happy Happy Sad You and I are beautifully broken. The others resent our superiority Cleaved Cleaved Sad Sad
- At present that you have completed the maze you will come across 2 staircases leading up. Climb either 1 to the acme and you will find one of the gods waiting. Sliske will now have the two of you lot race to the Stone of Jas, get-go one to make it gets the stone. But it hardly seems fair for the lowly World Guardian to compete against a god, and then Sliske gives you a flake of an advantage by delaying your opponent for a few moments. You will need to bound a few gaps before reaching the end; and will have the opportunity to pull a switch to delay your opponent twice forth the mode. Note that your opponent must not take passed the strings along their path in order to be delayed.

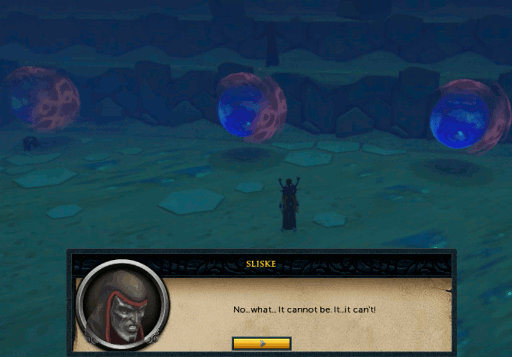
- Once the stone has been reached by you lot or your opponent, the winner will brand a speech of sorts about it and exchange some barrack with Sliske. After a brusk while, both Zaros and Seren will appear, much to Sliske's dismay. The particulars of how the next few scenes develop depend upon your choices during the quest and in quests leading up to this 1. Regardless of how the events transpire, Kerapac volition appear and smash the Rock of Jas.

- Following a brusque conversation between yourself and Sliske, the battle will begin. Now is the time that you volition want to gear upwards and summon your fauna of burden if you chose not to earlier. None of your opponents are weak to a item combat fashion so your highest combat skill is recommended; it is highly recommended to employ weapons with area of assault abilities for the start wave, the residual are completely upwards to y'all. In that location is a total of 3 fight waves, each with a few phases to piece of work through. Dying at whatsoever point from here, you will find yourself in Death's office able to buy back your items and your grave marker near Relomia outside the Heart of Gielinor. After you have completed a wave, you volition have reached a check point and tin can return to that particular fight. Note that your progress in that fight volition not exist saved, however, you volition not need to redo whatever waves you take already finished when you return. To exit there is a portal in the South end of the arena that you must right click and cull "exit portal" to go out.
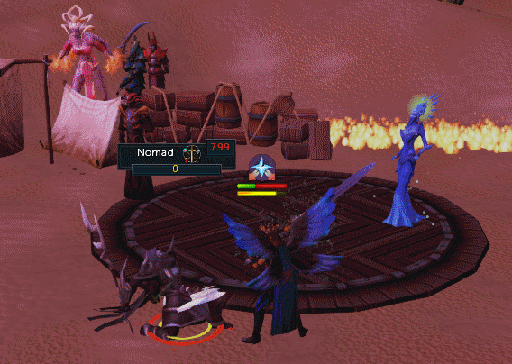
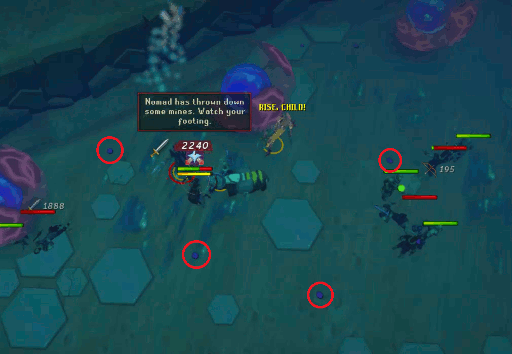
- Wave 1 - As the commencement wave begins, you will be attacked by Wight footsoldiers and Wight rangers that spawn from 3 portals at the North end of the arena. At the top of your screen you volition notice a bar that fills as yous impale these wights. Equally the bar fills Sliske will later add Imbued wight footsoldiers (slightly larger and stronger than normal) and and then Unstable wight footsoldiers (even stronger and larger, plus they explode upon expiry, damaging annihilation within range). Exist sure to use caution when performing expanse of assail abilities on/around Unstable wights considering of their explosions. The moving ridge will be complete, and check indicate reached, when yous have killed plenty wights to make full the bar at the tiptop.

- WAVE ii - Sliske will now summon the Barrows Brothers and effort to get them to attack you. Still, due to Kindred Spirits, the brothers will be able to disobey Sliske and will instead assist y'all by fighting wights during this phase. If necessary, accept a moment to leave via the get out portal to restock and/or change weapons. Y'all volition at present be required to defeat Nomad, Gregorovic, and Linza to progress to the adjacent wave. They can be killed in whatever order of your choosing, nevertheless once you defeat one of them, those remaining will regenerate total health and exist able to use a new power. Due to how these abilities part, it is recommended to kill Nomad get-go, Gregorovic 2nd, and Linza third. In one case you accept defeated them all, another checkpoint volition be reached and you will continue to the terminal wave.
- Nomad - Has 100k wellness and begins with auto-attacks and mines. When he is i of two remaining, he gains a powerful magic blast. If he is left until last, he volition proceeds the ability to create clones.
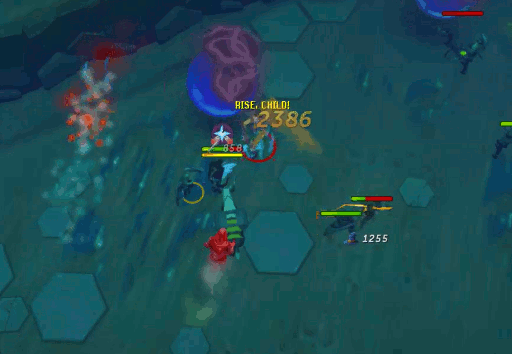
- Gregorovic - Has 200k health and begins with the ability to summon a healing spirit (Spirit of renew) that volition heal him 10k health if they bear on; you can interrupt this by killing the spirit before it reaches him. When he is one of ii remaining, he gains a knife throw attack and shadows. If he is left until final, he will proceeds the ability to create shadow clones.
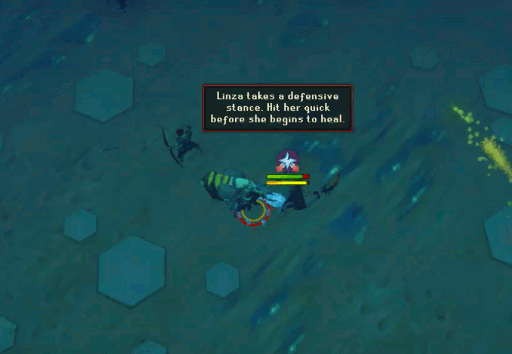
- Linza - Has 150k health and begins with the abilities to stun and reverberate damage. When she is ane of two remaining, she gains a healing defensive stance which regenerates 1,500 wellness every few ticks; this can be interrupted if you crusade enough impairment to her. If she is left until last, she will gain an surface area of set on ability; because she tin, and often will, stun just before it goes off, exist certain yous have freedom prepare to employ.
- Nomad - Has 100k wellness and begins with auto-attacks and mines. When he is i of two remaining, he gains a powerful magic blast. If he is left until last, he volition proceeds the ability to create clones.
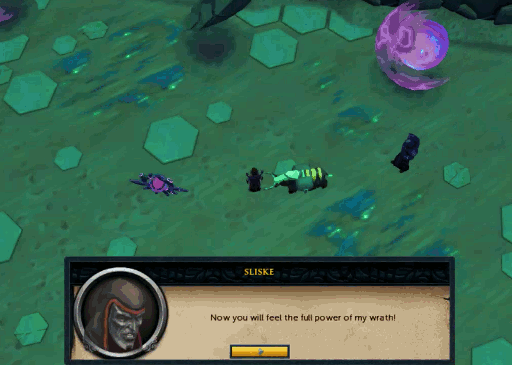
- Wave iii - The get-go phase of the terminal wave confronting Sliske will at present begin. If necessary, take a moment to leave via the get out portal to restock and/or change weapons. Throughout the fight, he will use Magic to fight then while he is non weak to whatever attack fashion, range may exist a wise option for you to utilise as information technology volition help protect yous from his attacks. He volition also apply a special attack where he will summon shadow hands that reach up from the ground and cause 25% of you max health every few ticks. Avoid these just by stepping out of the way. Sliske can predict where you are going, then use of surge, escape, or random clicking is suggested. He will summon 5 before resuming his normal attacks.
- Sliske volition begin with 100k health. Attack him until he reaches well-nigh 10k wellness, at which point he will disappear and yous will exist able to interact with the arena. Take reward of this slight reprieve and assault the power source (1,000 wellness and weak to crush).
- Once the power source has been destroyed, Sliske will reappear with 100k health once again and resume fighting you with the same tactics every bit before. Attack him downwardly to most 10k health and he will disappear again. You will likely run across purple lightning in the arena at present; run from this and enter either of the portals at the N stop of the arena.
- Sliske will pull y'all back to the realm yous merely left, reappear with 100k health once again, and resume your battle. When you lot become him down to 10k health once more, he volition teleport out once more. Jump onto the boulder at the North cease of the arena and yous will throw him back into the area.
- Yet again, Sliske will regenerate to 100k wellness and you must attack him until he reaches 10k. The bright side is that this time he volition not be able to teleport away. Anticipating his move, yous will be able to end his escape.
- Yous will now accept reached the final bank check point! You will activate your World Guardian powers; given unlimited health, unlimited full adrenaline (or full special bar in Legacy), and a reduced cooldown rate on all abilities. Despite the fact that Sliske was able to regenerate to 100k health 1 last time, yous can and volition withal severely kicking his butt.
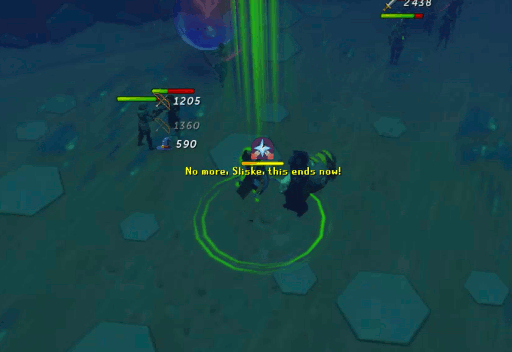
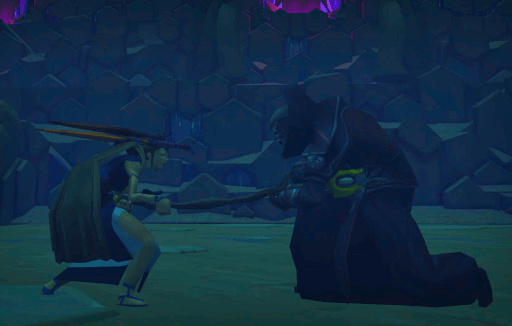
- Continue fighting until y'all reach the cutting scene, at which point you will kill Sliske using the Staff of Armadyl, just not before existence seriously injured yourself. You volition laissez passer out from this wound and presently wake upwards.
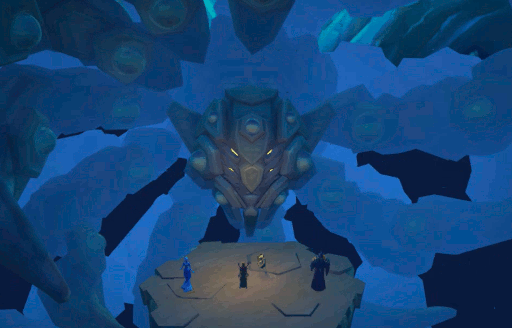
- In the presence of Jas with you lot and Seren, Zaros volition attempt to merits what he considers his birthright from Mah, her rank amidst the elderberry gods. Jas volition refuse him as he cannot brand life from zilch as Mah could. Zaros and Seren will and then exit and Jas will question you lot as to why Sliske was killed and then why Gielinor should exist spared. Before kick you out, yous will be permitted to inquire one question. It is your choice what to ask.
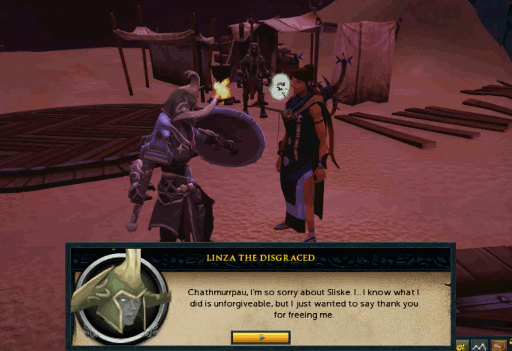
- Y'all volition be forced to get out Jas and return to just outside the Heart of Gielinor. Here, Linza will repent and say what she plans to practise with Sliske at present gone. Yous will talk briefly with Armadyl and Seren and and so to Expiry and/or Icthlarin. Whither you lot choose to tell them well-nigh the truth of how you are doing or not, you lot will ultimately be unable to bring yourself to say the words. While almost are jubilant Sliske's defeat you are reminded that Relomia volition still need to be informed.
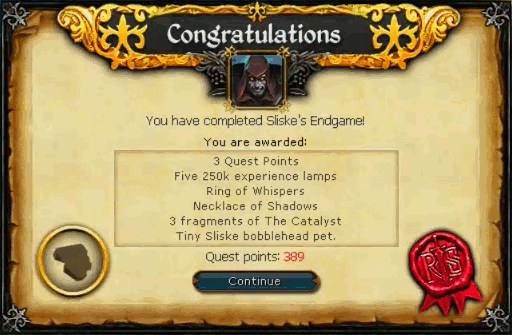
- Travel to Draynor Village and visit her in her normal location, Due north of the depository financial institution and the Wise old man's dwelling. You volition have the option to tell her gently, cruelly, or nonchalantly; the way you tell her will affect her response. Regardless of which selection you cull, you will momentarily black out and hear Sliske'south laughter. When the image returns, her demeanor will alter completely and she will happily give you a reward for your participation.
- Congratulations! Y'all take finished the quest.
Now that you accept finished the initial play-though of Sliske's Endgame, yous have the unusual ability to replay the quest. If you've ever wondered how you would accept fared in the maze past claiming a different allegiance or choosing another activity, now is the time to take advantage of this opportunity. Simply speak to Relomia about Sliske'south Endgame and cull to replay it.
Be aware that replaying the quest will not touch on your cannon adventure unless you choose to allow it. You are allowed merely 1 (1) play-through that will supplant your initial quest choices. Once you have "claimed" your new cannon it is unable to be changed over again!
Since this quest tin can be replayed, it is simply fair for you to receive a reward, is it not? For every replay of the quest you lot will not receive the same prizes as the initial play-through. Instead, you will have the option to receive the Agent of the Eldest cosmetic outfit likewise as a Medium prismatic lamp. To obtain the outfit, you will need to consummate a play-through without skipping whatever interactions or dominate fights.
During the not-cannon play-throughs, it is possible to change past quest related events. These events include:
- Choosing to give Saradomin the Wand of Resurrection in The Death of Chivalry or not.
- Using a dark or calorie-free simulacrum on Zaros in Fate of the Gods.
- Choosing to help Zamorak, Sliske, or neither in Dishonour among Thieves.
- Sacrificing Eluned in The Light Within.
- Choosing to use the dark shard to restore Seren fully or non in The Light Within.
- Whom kills Gielinor during Nomad's Elegy - Death or Icthlarin.
- Which God y'all swore allegiance to during the Boxing of Lumbridge.
- Which God you swore fidelity to during the Bird and the Beast.
This Quest Guide was written by ChathMurrpau and Owain121. Thank you to Rooskii, Flama, U Dade, and Dni Mclovin for corrections.
This Quest Guide was entered into the database on Thu, January 12, 2017, at 05:23:34 PM by ChathMurrpau, and it was last updated on Tue, May 28, 2019, at 03:24:33 AM by Chath.
If you lot run across this guide on any other site, delight study it to united states and then we can take legal activity against anyone institute stealing our content. This guide is copyrighted past RuneHQ, and its employ on other sites is expressly forbidden. Do not ask if you lot can use our guides or images, the answer is and e'er will be NO!
Print this folio with images - Back to the Quest Guide Alphabetize Page - Back to Top
Source: https://www.runehq.com/quest/sliskes-endgame
0 Response to "What to Use My Sliskes Endgame Lamps on Rs3"
Post a Comment